
Need a high-quality microphone for your Mac but don’t want to buy extra hardware? Good news—your iPhone can double as a powerful, portable microphone for your Mac. Whether you’re recording a podcast, joining a video call, or streaming, this guide will show you how to set up your iPhone as a mic for your Mac in just a few easy steps.
The iPhone’s built-in microphone is surprisingly capable, often outperforming the average laptop mic. Using your iPhone as a Mac microphone offers several benefits:
Superior audio quality for meetings, streaming, or recording.
Cost-effective—no need to purchase a separate USB or Bluetooth mic.
Portability for on-the-go recording or remote work setups.
Seamless Apple ecosystem integration for a smooth user experience.
Apps like WO Mic, Microphone Live, and Megaphone allow you to connect your iPhone to your Mac via Wi-Fi, Bluetooth, or USB.
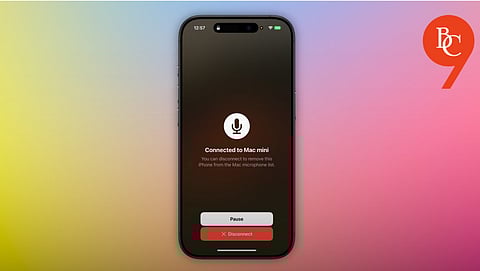
Apple is gradually expanding Continuity features, and some new versions of macOS and iOS may allow direct microphone sharing between devices. Check your system settings for any new “Input from iPhone” options under System Settings > Sound.
For a wired connection:
Use a TRRS cable (or Lightning to 3.5mm adapter for newer iPhones).
Connect your iPhone’s headphone jack (or adapter) to your Mac’s audio input.
Open a voice memo or microphone app on your iPhone and set Mac’s input to “Line In.”
With just a few steps, you can turn your iPhone into a high-quality microphone for your Mac, perfect for remote work, content creation, or online meetings. Whether you use a third-party app or take advantage of Apple’s latest features, this setup is easy, affordable, and highly effective.

